The smart switch opens new possibilities for convenient lighting control. You can set timers, create schedules for turning on the lights, or activate automated scenarios. In addition to simply turning the lights on and off, this switch can simulate the presence of the homeowners, enhancing your home’s security. It can also control lighting from two or more locations.
2 way switches operate in pairs, trios, or quads. A minimum of 2 switches is required for proper operation.
Important: LIVOLO passage switches are incompatible with mechanical passage switches.
5 Ways to Control
- By touching the sensor panel
- Through the LIVOLO HOME app on your phone
- With voice commands via Google Home or Amazon Alexa
- Using a wireless switch
- With a remote
Features
- Can be used with any light source from 1 W to 1000 W.
- Backlighting in blue and red colors.
- Can be installed in both standard and deep mounting boxes.
- Can be installed horizontally or vertically.
- Up to 5 units can be installed in one frame.
- Mounted to the junction box with screws.
- Used with a tempered glass frame.
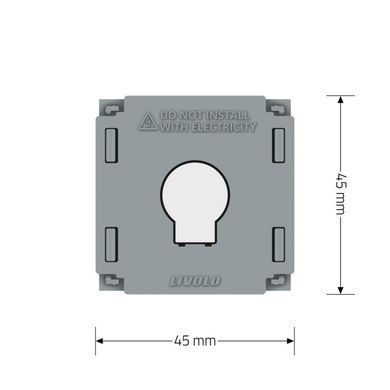
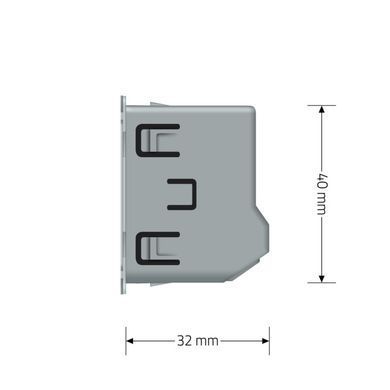
Size
The compact dimensions allow the switch to be installed in mounting boxes of any building standards adopted in our country. This greatly simplifies self-installation of switches—no drilling or other complicated procedures required.


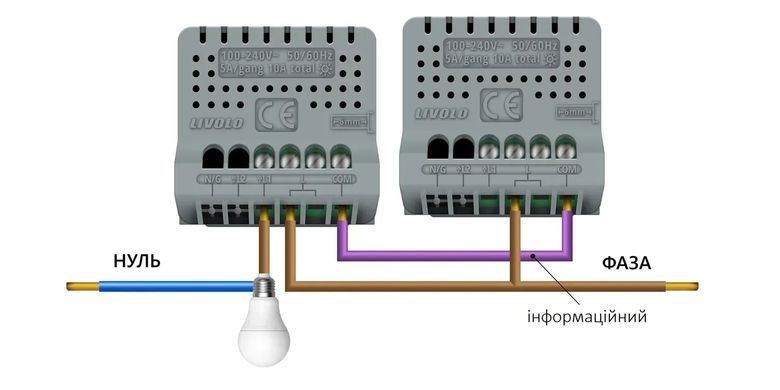
Wiring diagram of 2 way switches
The load is controlled by the Main (Master) switch, and the Secondary (Slave) switches send the on/off command to the Main switch.
For connecting the Main (Master) switch, the following terminals are used: Lin - phase, L1 and L2 - output to the load lines, COM - information. For connecting the Secondary (Slave) switch, two terminals are used: Lin - phase, COM - information.
Attention! The pass-through switch function starts working only after programming. Without programming, only the Main (Master) switch will turn the light on and off.
Connection diagram for Livolo touch pass-through switches for controlling lighting from two locations:


Connection diagram for Livolo touch pass-through switches for controlling lighting from three locations:

Programming:
Step 1: Touch the sensor of the Main switch and hold your finger until you hear a beep (approximately 4-5 seconds). Release your finger from the sensor area.
Step 2: Touch the sensor of the Secondary switch for half a second.
Resetting the programming:
Touch the sensor of the Main switch and hold your finger until the second beep (approximately 10 seconds). The programming will be reset.
Connecting the switch
1. Turn off the power supply
2. Connect the switch according to the diagram
3. Screw the switch to the socket outlet
4. Install the touch panel
5. Apply the voltage
6. The switch starts working in 15 seconds

Designed for installation with a touch panel
The touch panel is supplied separately.










 Pickup from the branch from UAH 70
 Delivery to the post office from UAH 50
 Courier to the address from UAH 100
 Pickup from the branch from UAH 30


 Online by Visa or Mastercard
 Payment by parts PrivatBank
 Hire Purchase monobank
 Payment by IBAN details
 Payment upon receipt
 Warranty - 5 years
 Returns within 14 days
 Exchange within 30 days
 Accumulative discount