
The touch dimmer has a single sensor that operates in two modes: on/off and brighter/dimmer.
Features of dimming:
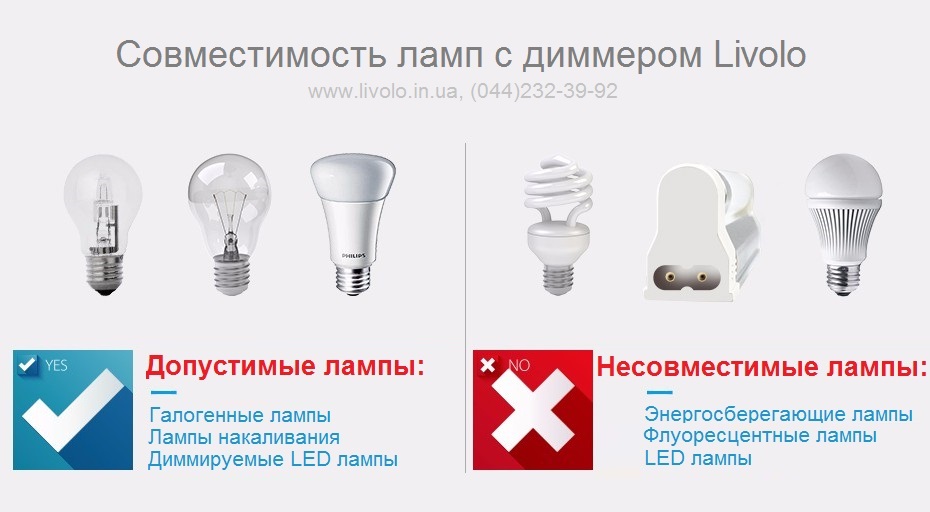
1. The Livolo touch dimmer is suitable only for LED bulbs that support dimming. When purchasing LED bulbs, ensure they are labeled as "Dimmable". Incandescent and halogen bulbs also support dimming.
2. The dimmer is not suitable for non-dimmable LED bulbs. Connecting the dimmer to a non-dimmable bulb can damage the dimmer.
3. The load power should be between 25 watts minimum and 500 watts maximum. The dimmer may experience slight heating.
4. Livolo touch dimmers operate with LED bulbs using TRIAC technology.
Dimmer Installation
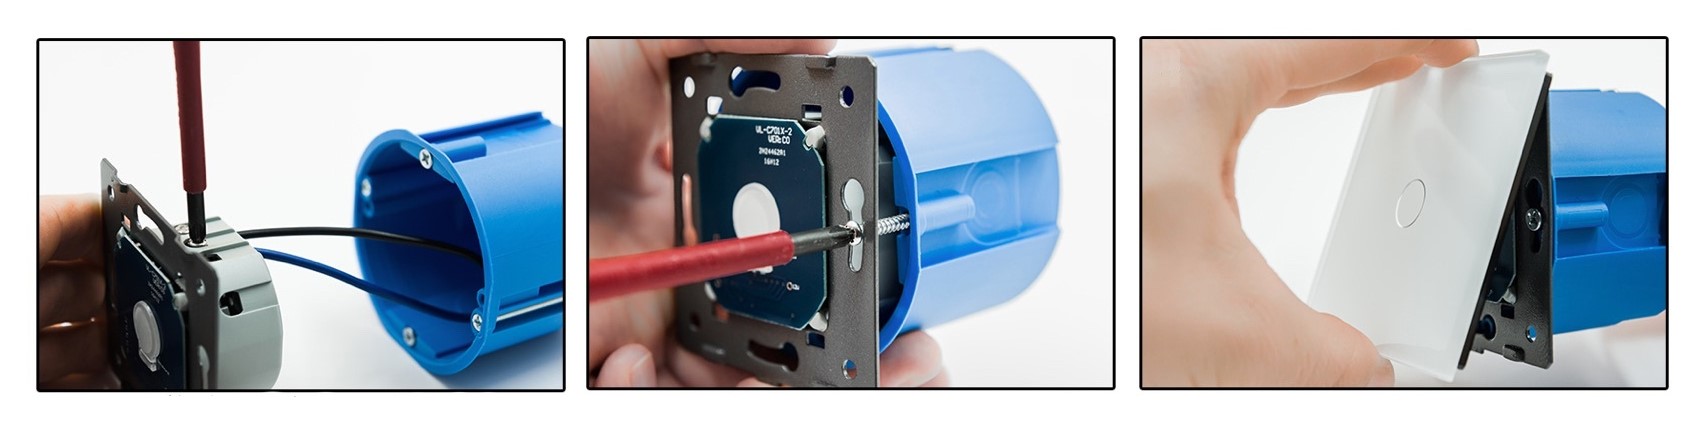
- Turn off the power supply.
- Connect the dimmer according to the diagram.
- Secure the dimmer to the socket using screws. The dimmer fits into a round socket and is secured with screws 60 mm apart.
- Install the touch panel.
- Restore power supply.
- The dimmer will start working after 15 seconds.
Dimmer Control
- Briefly touch the dimmer sensor to turn the light on or off.
- Hold your finger on the sensor to adjust the brightness of the lamp.
- Upon turning the dimmer on again, it will restore the brightness level of the lamp set before it was turned off.
Wiring diagram for Livolo touch dimmer:
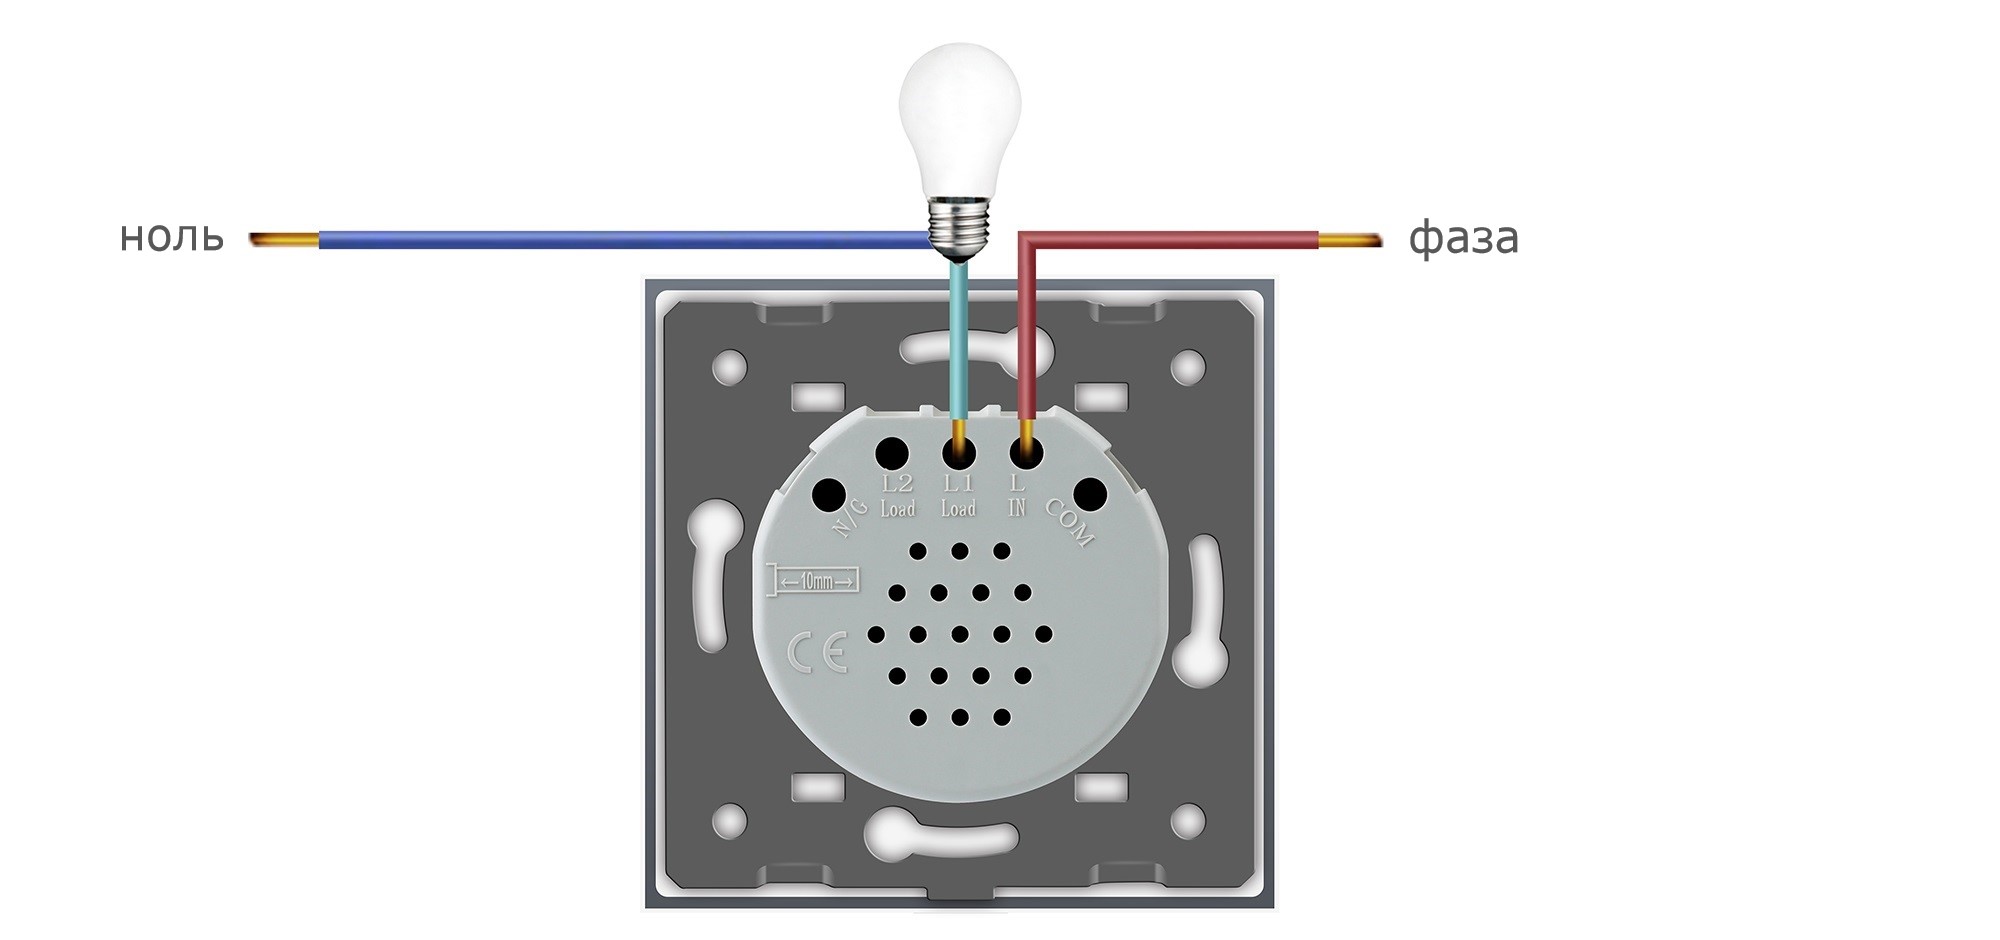
Models VL-C701D, VL-C701DR, VL-C701DZ. On the back of the dimmer, there are two terminals for connecting phase and one for the load line.

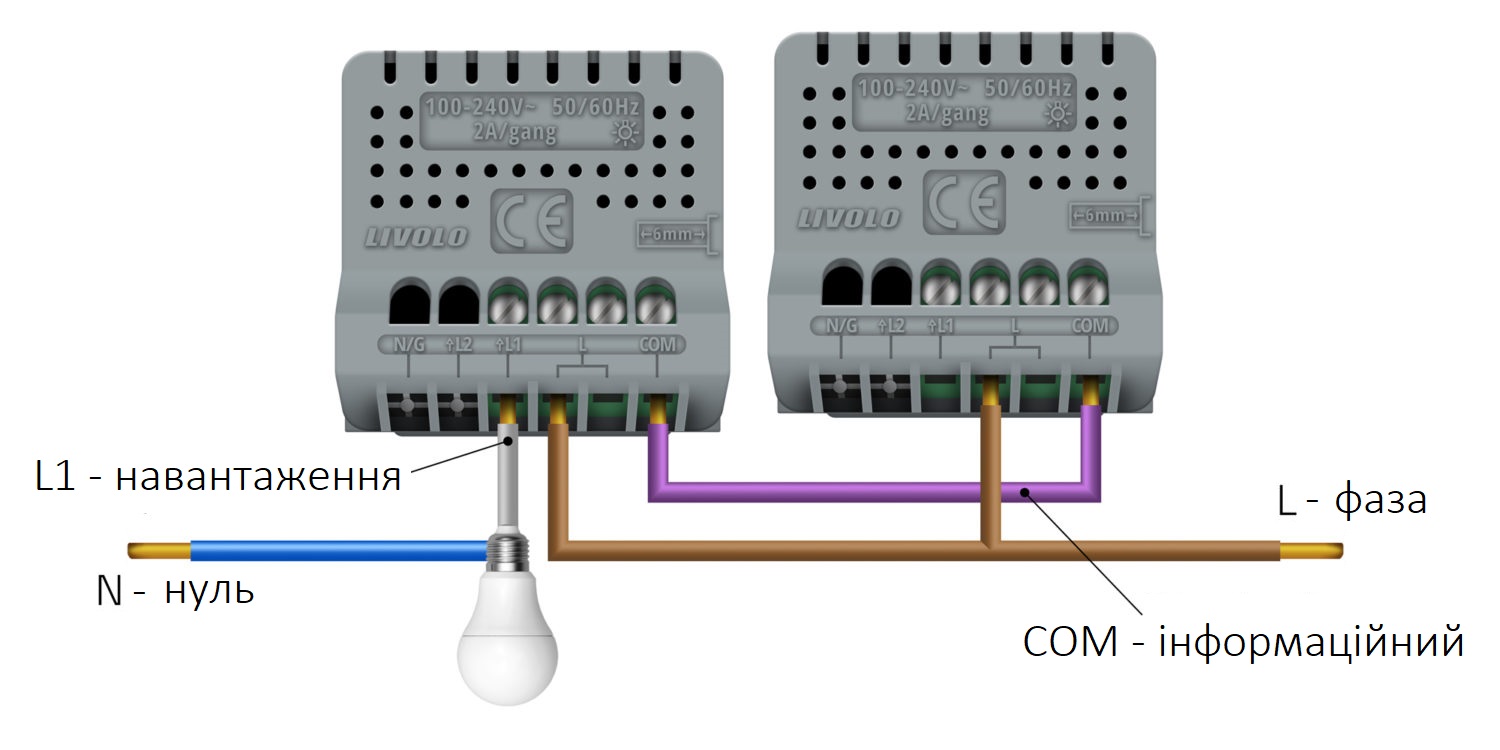
Dimming from multiple locations. Installation of a bypass dimmer.
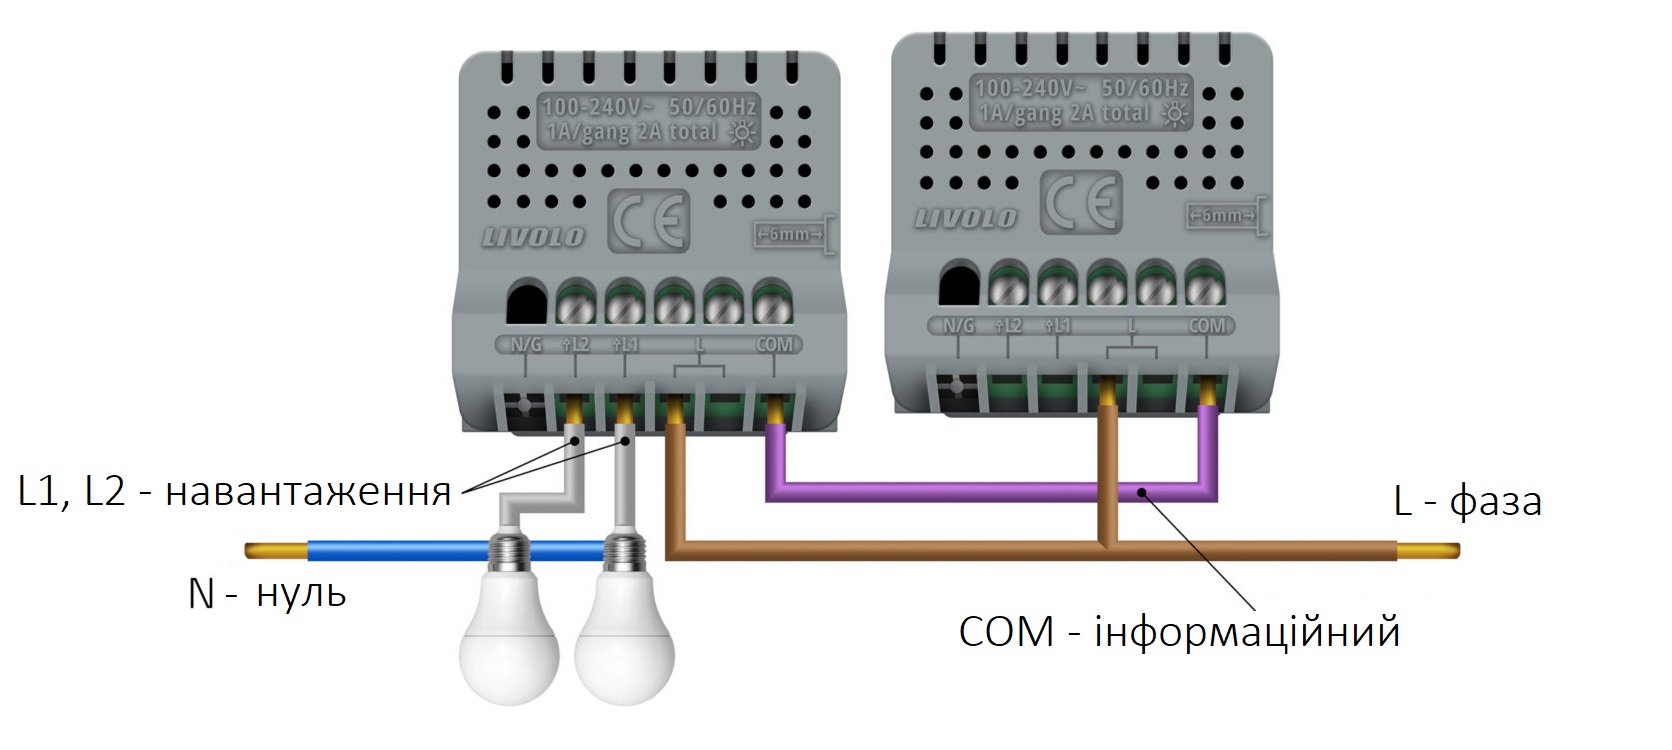
To switch and control the brightness of a lighting fixture from two places, use the connection scheme provided.
The main (Master) switch is a dimmer to which the load is connected. It operates in on/off and brightness adjustment modes for lighting.
The secondary (Slave) switch is a 2 way switch that operates in on/off mode. It sends on/off commands to the main switch.
- For connecting the main (Master) switch, use terminals: L - phase, L1, L2 output for load lines, COM - informational.
- For connecting the secondary (Slave) switch, use two terminals: L - phase, COM - informational.
Connect the phase voltage to the "L" connection point on both switches, connect both switches with an informational wire at the "COM" connection point, and connect the lamp wire to the dimmer at the "L1", "L2" connection points.
After connecting the wires and reconnecting the voltage to the network, the switches need to be programmed. Programming should start with the main switch. More details on programming are available.
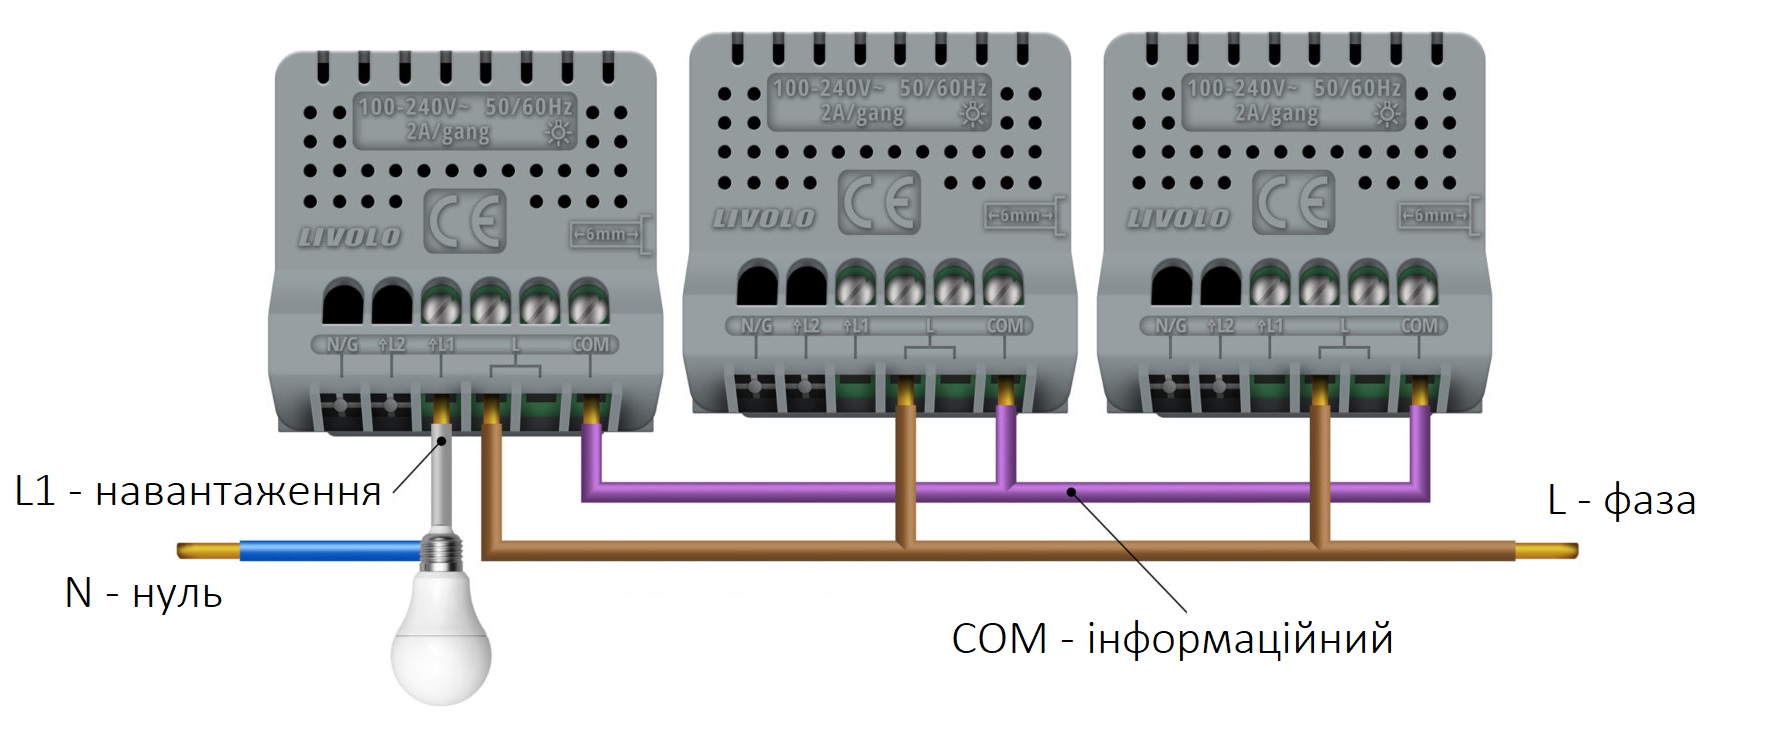
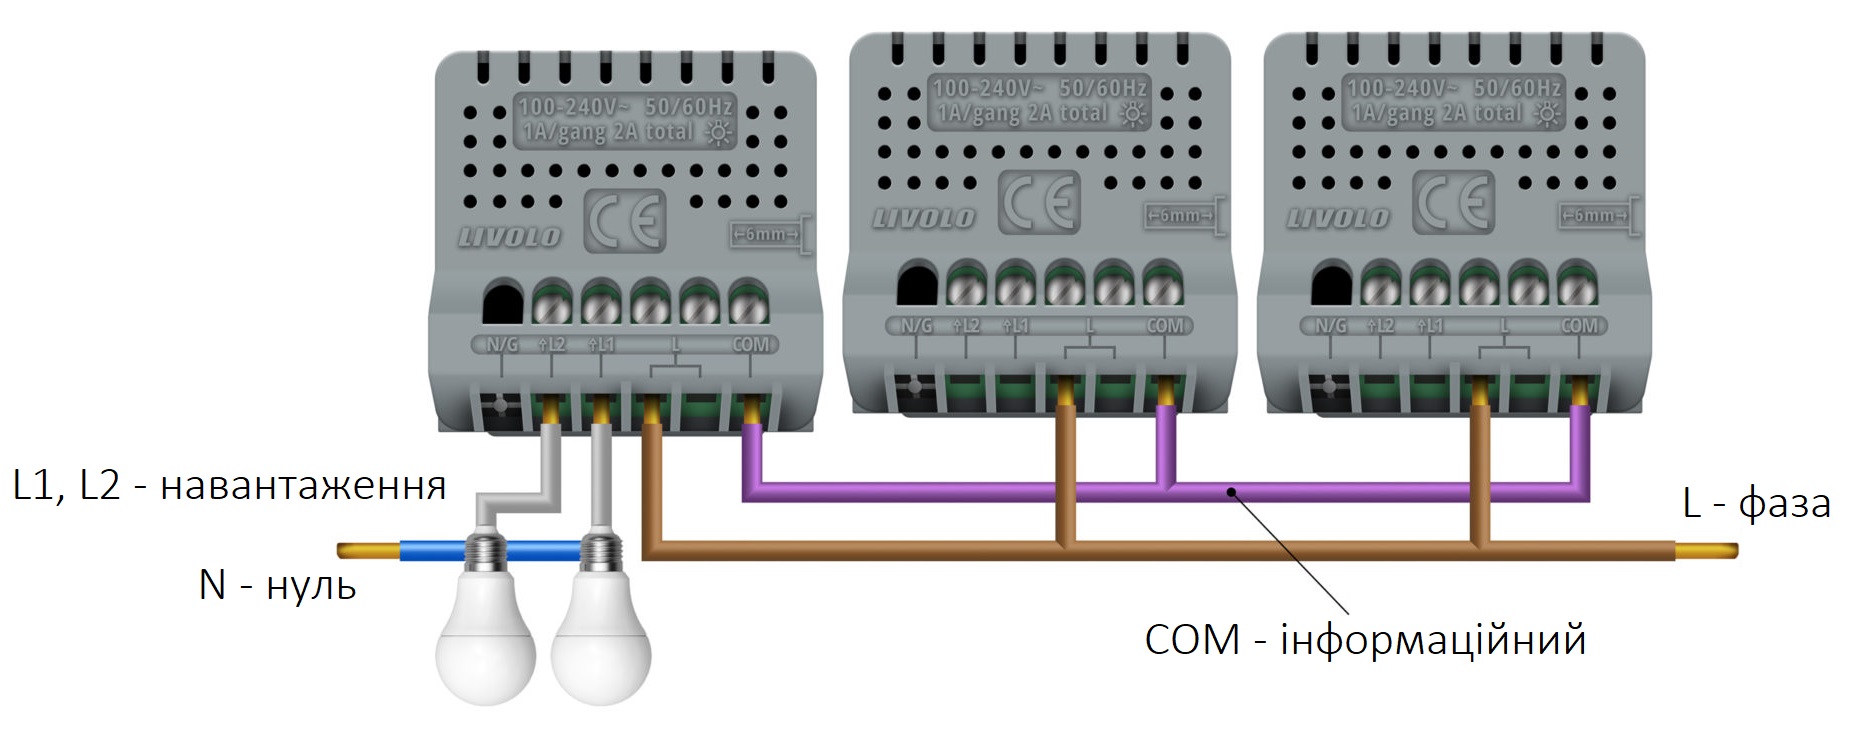
If you want to control lighting from three different locations and adjust brightness, use the following connection scheme. Connect the phase voltage to the "L" connection point on all three switches. Use an informational wire to connect all three switches at the "COM" connection point. Connect the lamp wire to the dimmer at the "L1" and "L2" connection points.
After connecting the wires and reconnecting the voltage to the network, the switches will need to be programmed. Programming should start with the main switch. More details on programming are available.
Dimming from multiple locations using impulse switches and a dimming relay
It is implemented using impulse buttons connected to an impulse dimming relay. This setup allows for adjusting brightness from an unlimited number of locations.
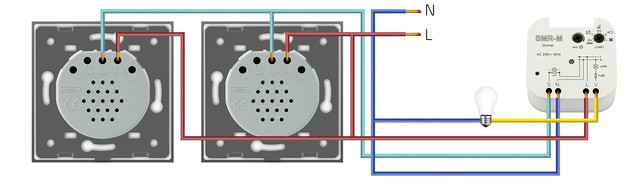
A set of switches for adjusting the brightness of the light from two places is available for purchase
Dimming LED Strip Lights with LIVOLO Touch Dimmer
To control the brightness of an LED strip using a LIVOLO touch dimmer, it’s important to choose the correct power supply. You must use a dimmable TRIAC power supply that supports phase-cut dimming (Leading Edge type).
Key points to pay attention to:
-
TRIAC marking — the power supply must be specifically designed for use with phase dimmers. This ensures compatibility with LIVOLO dimmers.
-
Power rating — make sure the power supply matches the total wattage of your LED strip, with a 20–30% safety margin.
Standard power supplies for LED strips do not support dimming and may cause malfunction or equipment damage if used with a dimmer.
Use only compatible TRIAC drivers to enjoy smooth brightness control and create a comfortable lighting atmosphere in your space.